AWS (Amazon Web Services) is a cloud computing platform that offers a variety of services and features for users. One of the most important features of AWS is IAM (Identity and Access Management), which allows you to manage users, groups, roles, and permissions for accessing AWS resources.
In this blog post, we will learn how to create a role in AWS using IAM. A role is an identity that you can create and assign to a user, an application, or a service, to grant them temporary access to certain AWS resources.
For example, you can create a role for an EC2 instance to access an S3 bucket, or a role for a Lambda function to invoke another Lambda function.
Creating a role in AWS involves the following steps:
Step 1: Create a Role
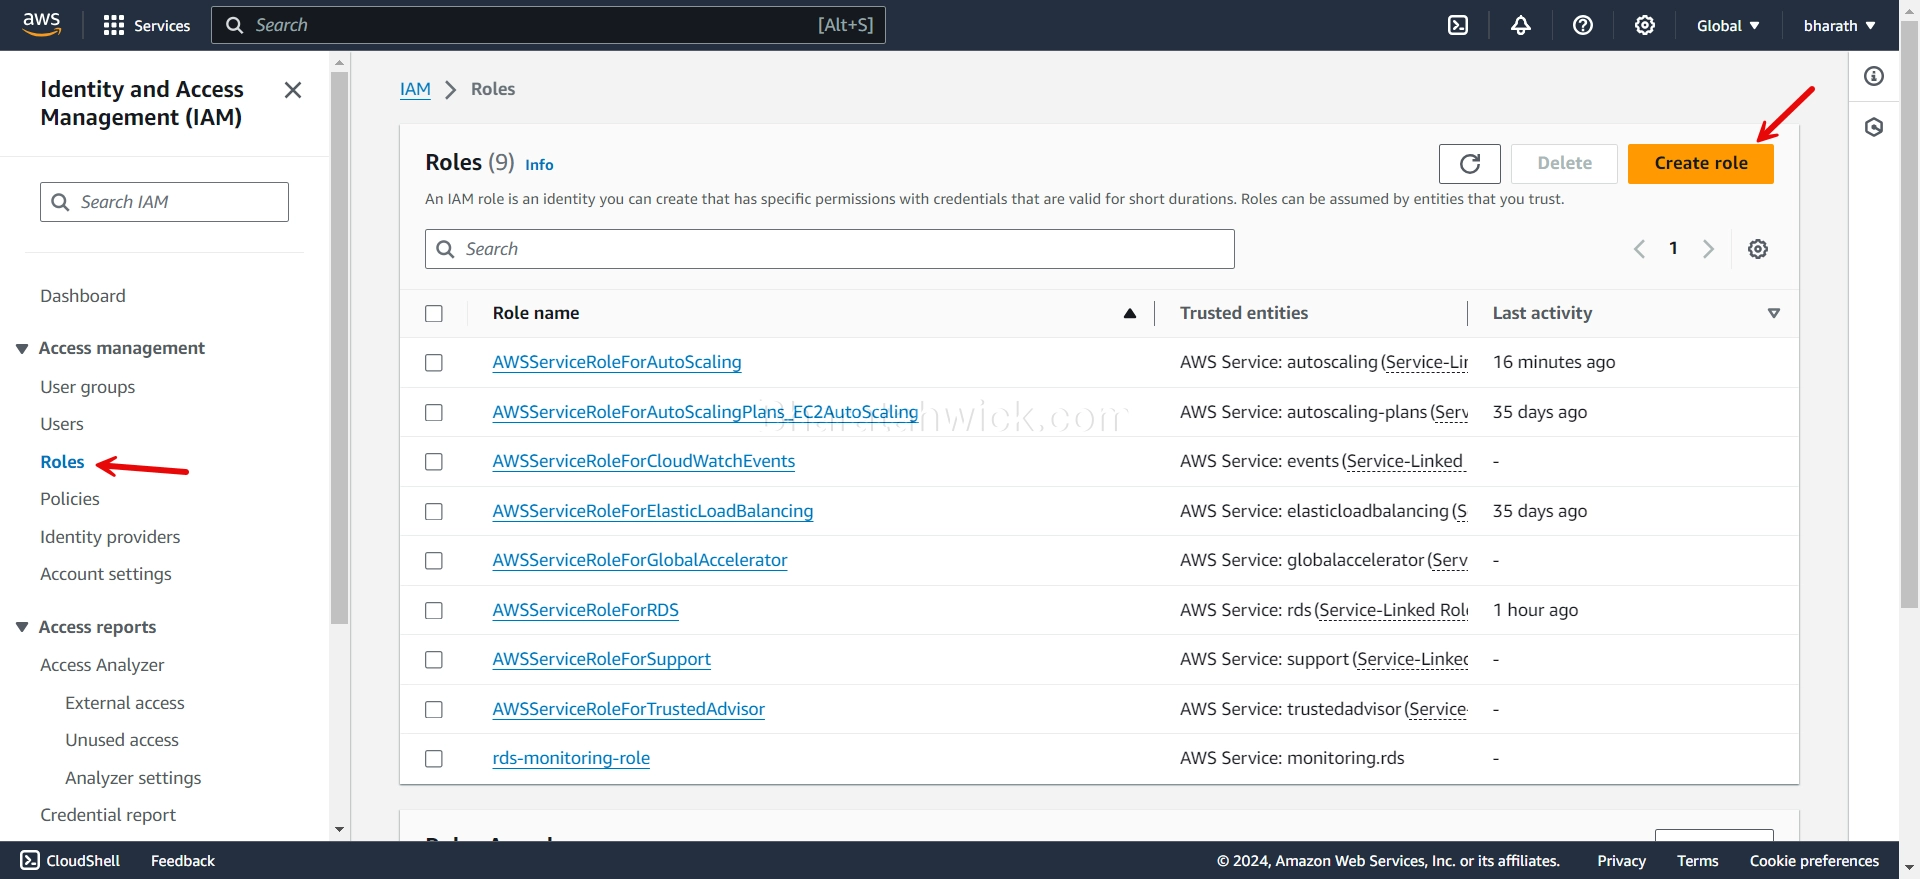
To create a role, you need to log in to the AWS console and go to the IAM dashboard. From there, you can click on the Roles option in the left sidebar and then click on the Create role button.
You will see a page where you can choose the type of trusted entity that will use the role. A trusted entity can be an AWS service, another AWS account, a web identity provider, or a SAML identity provider.
For this example, I will choose AWS service as the trusted entity and select EC2 (Use case) as the service that will use the role.
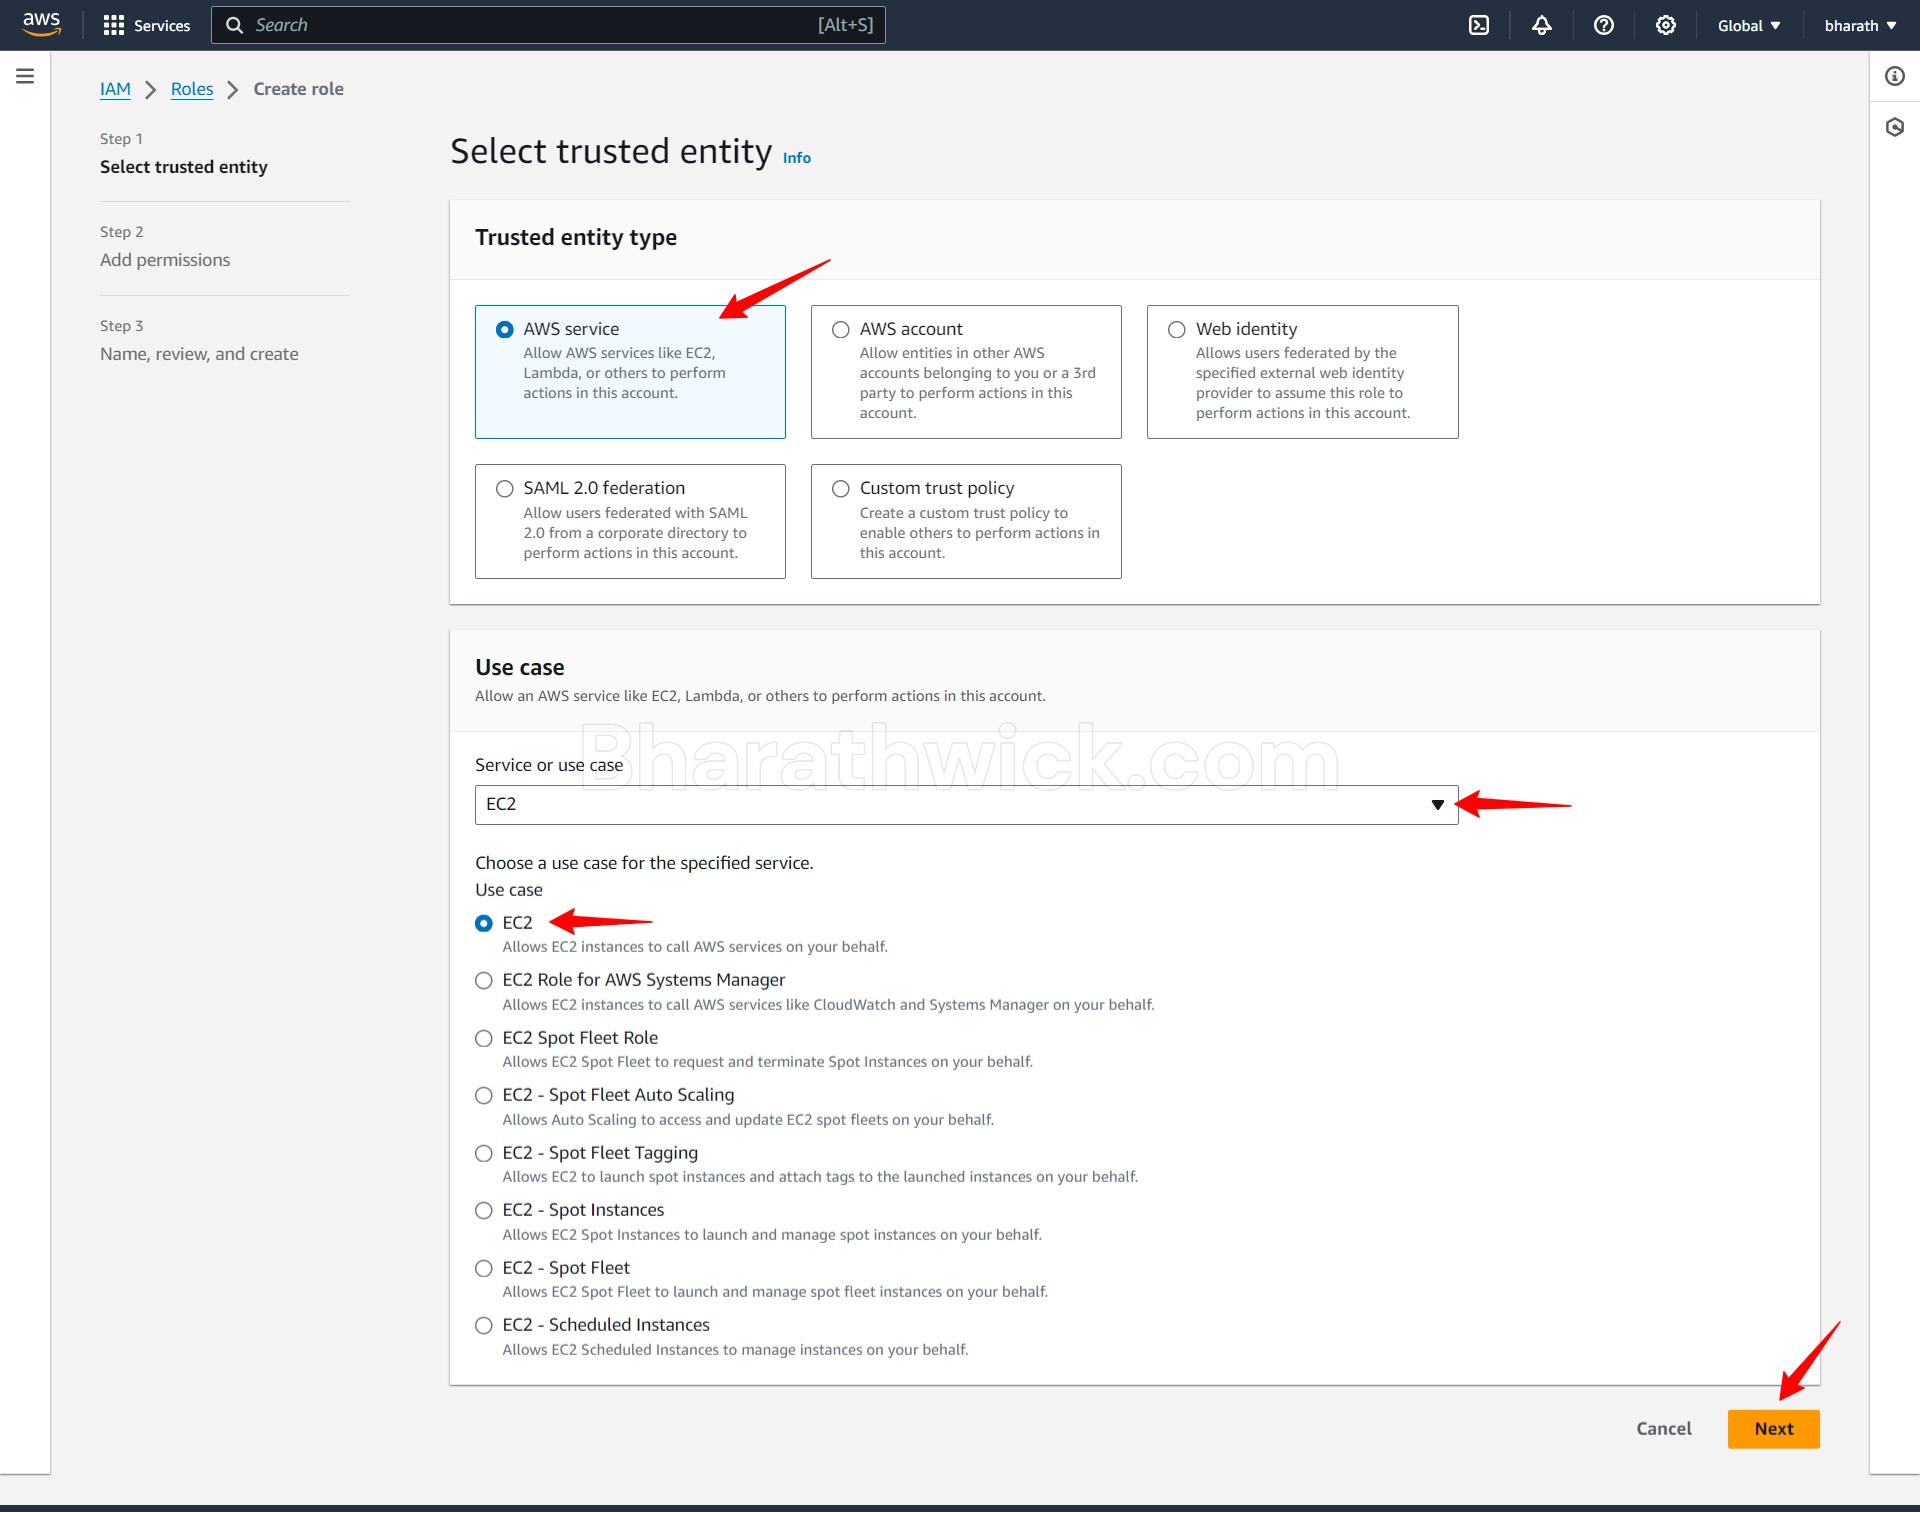
Click on the Next: Permissions button to proceed.
Step 2: Attach Policies
The next step is to attach policies to the role. Policies are documents that define the permissions for the role. You can choose from the existing policies that AWS provides, or you can create your own custom policies.
For this example, we will attach the AmazonS3FullAccess policy, which grants full access to S3 buckets and objects.
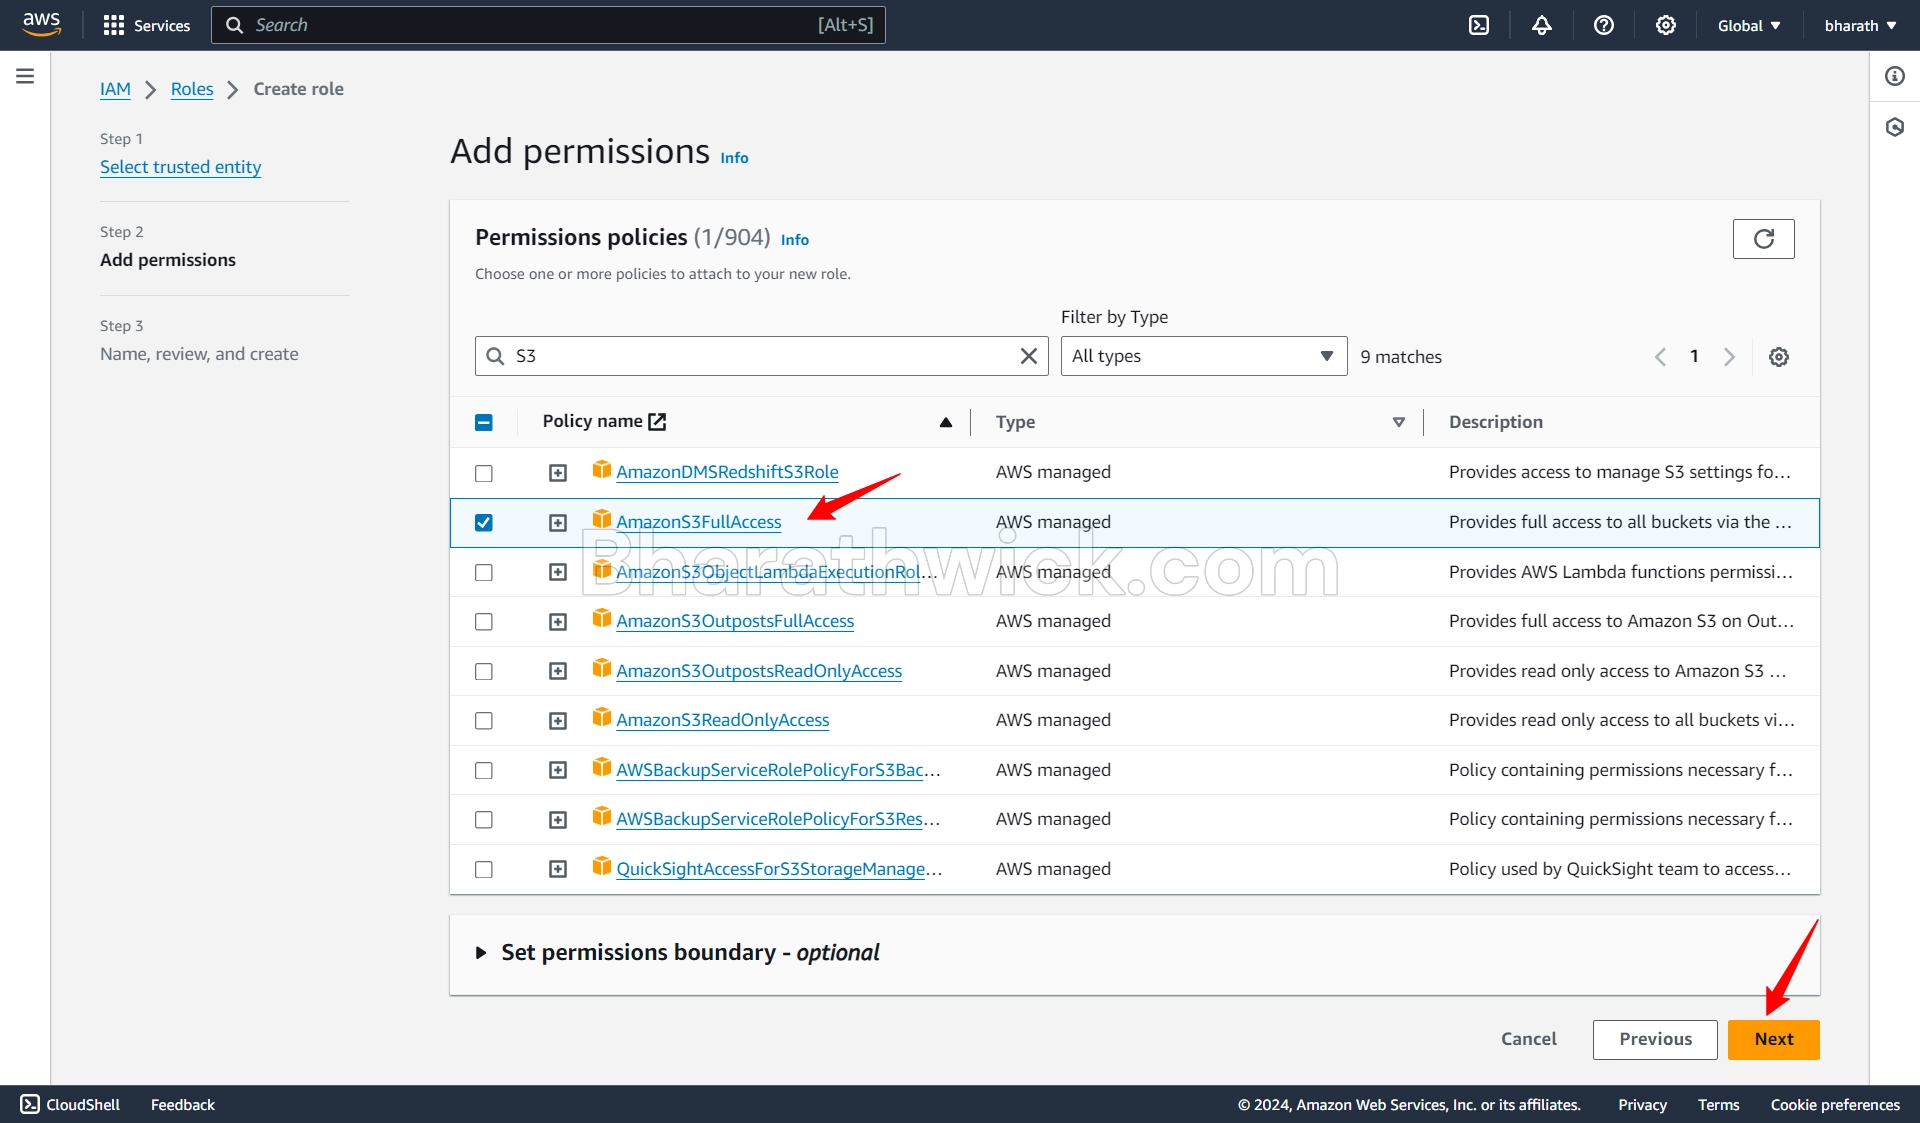
Click on the Next: Tags button to proceed.
Step 3: Add Tags
The next step is to add tags to the role. Tags are key-value pairs that you can use to organize and identify your roles. You can add up to 50 tags per role.
For this example, we will add a tag with the key Name and the value EC2-S3-Role.
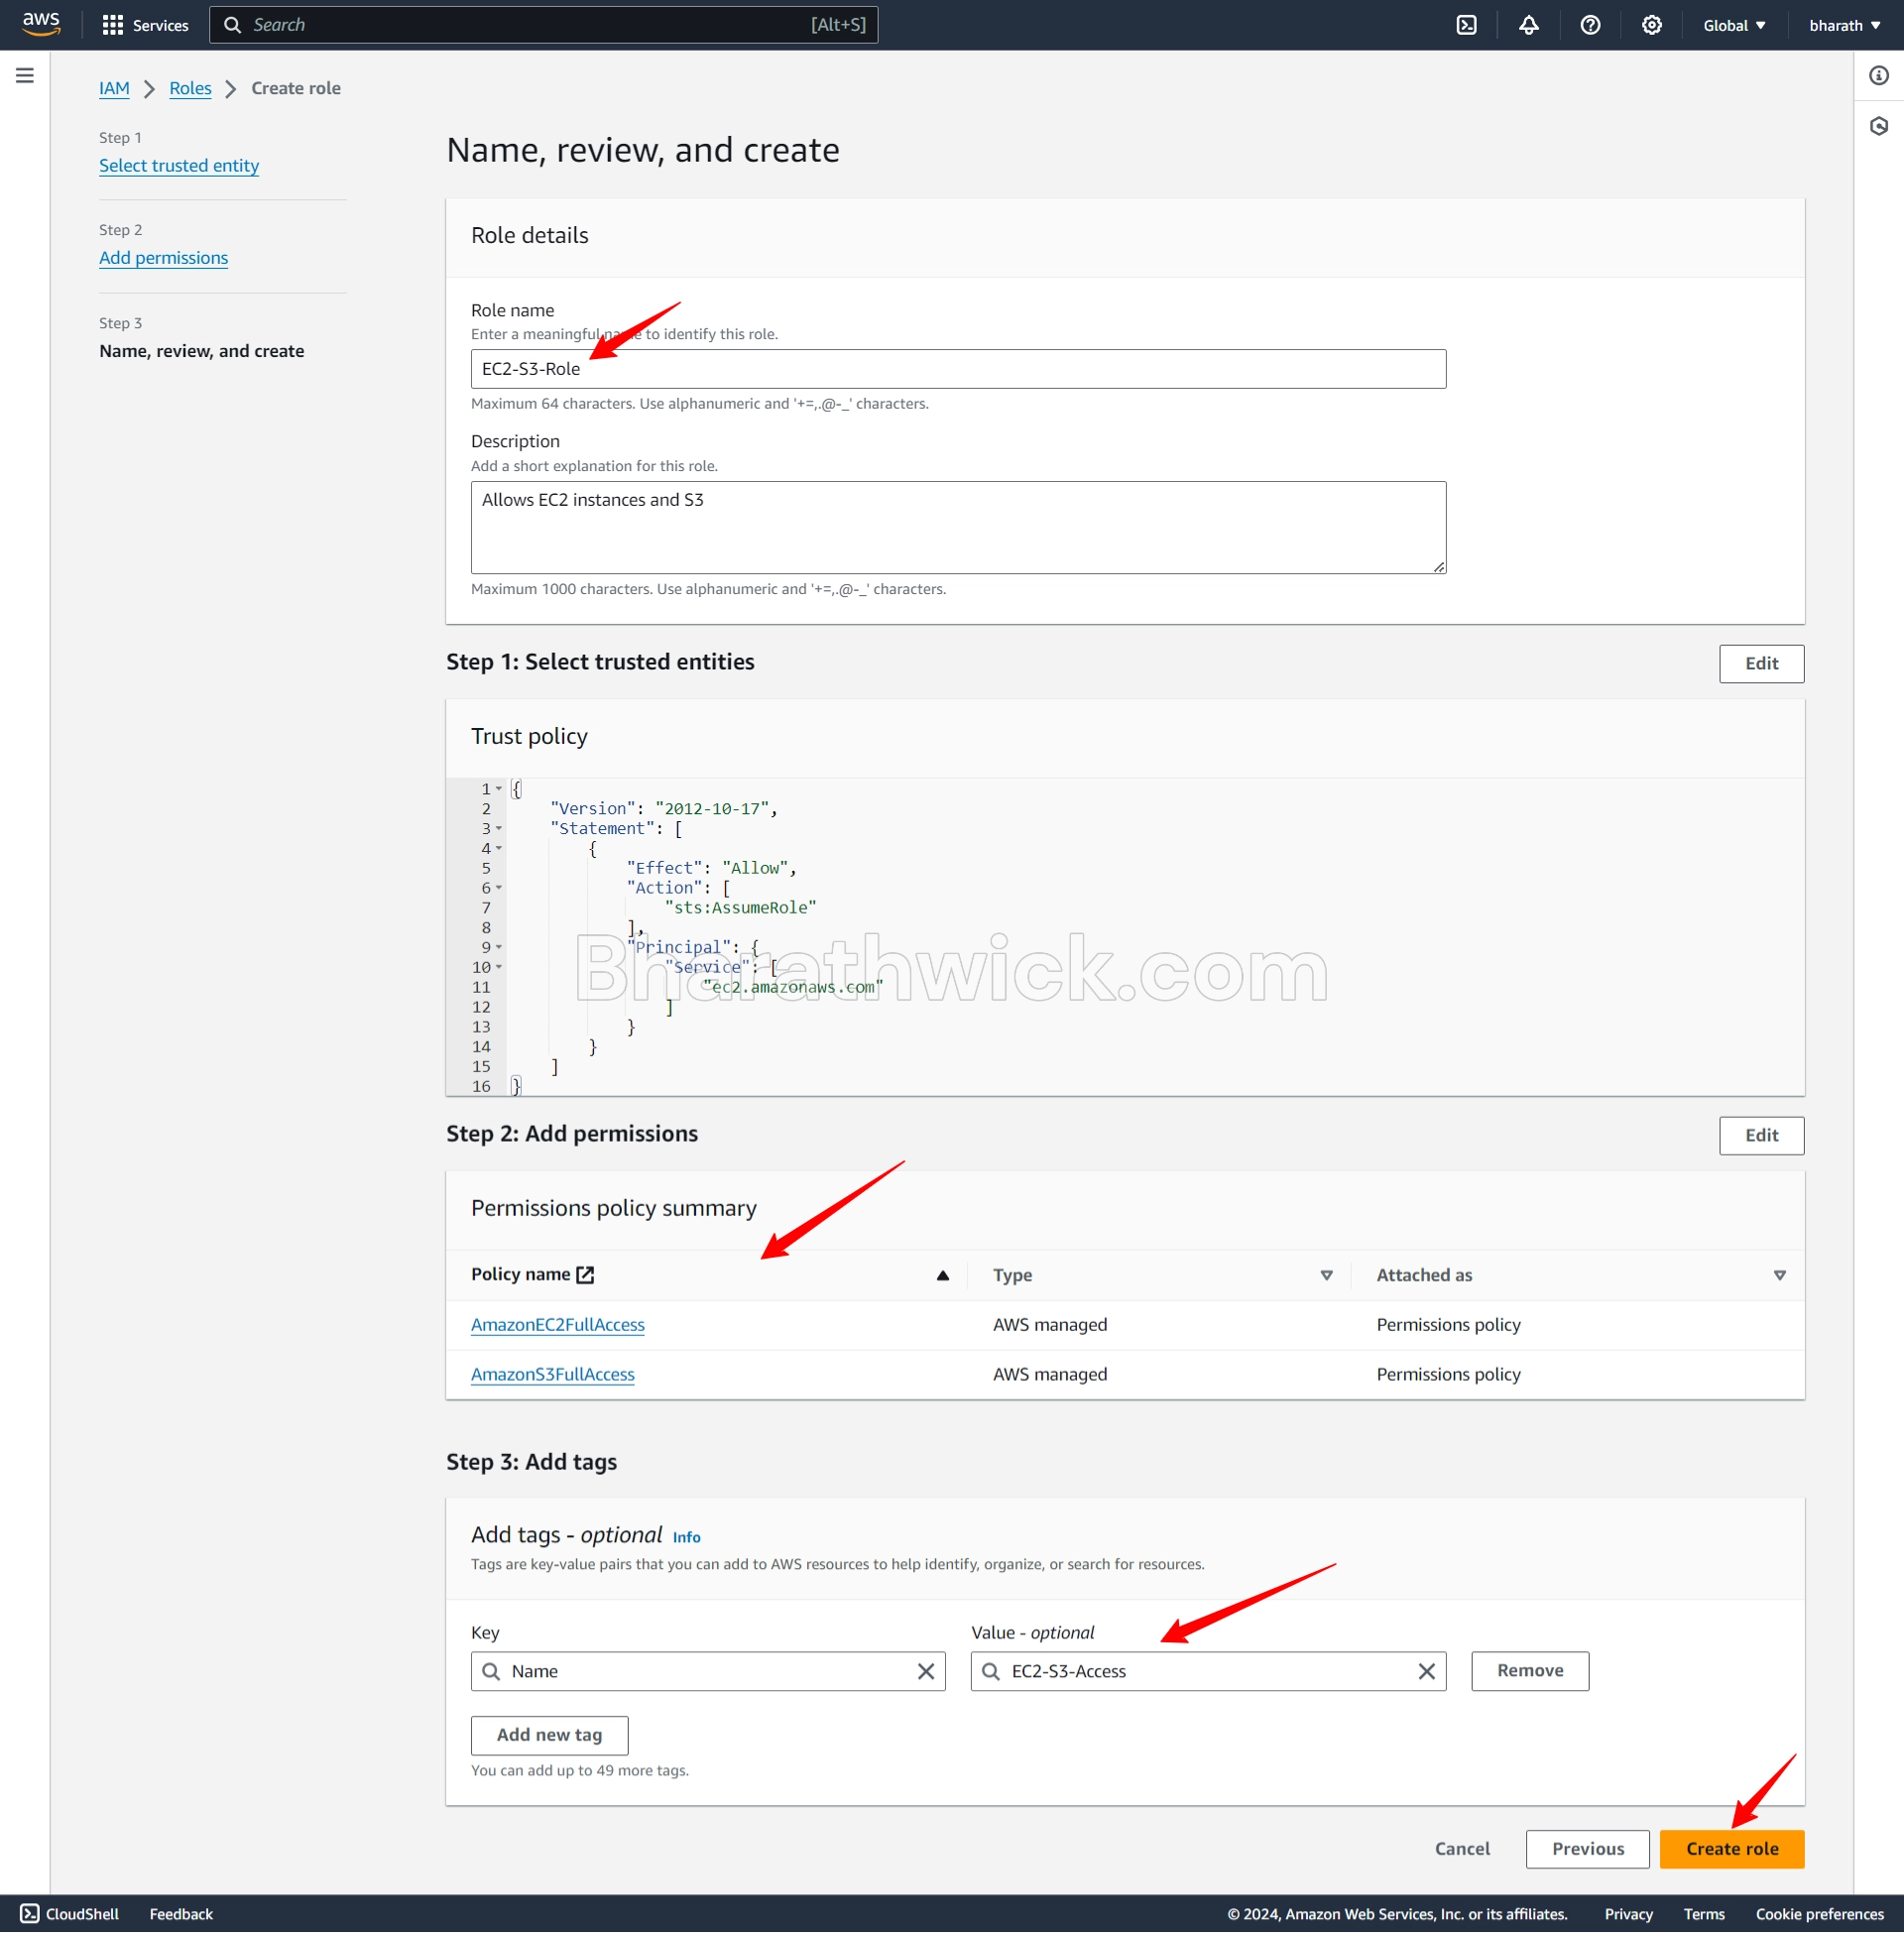
Click on the Next: Review button to proceed.
Step 4: Review and Create
The final step is to review the role details and create the role. You can see the role name, description, trusted entity, policies, and tags that you have configured. You can also edit any of these details before creating the role.
For this example, we will name the role EC2-S3-Role and add a description This role allows EC2 instances to access S3 buckets.
Click on the Create role button to create the role.
Step 5: Assign Role to User
The last step is to assign the role to a user, an application, or a service that will use the role.
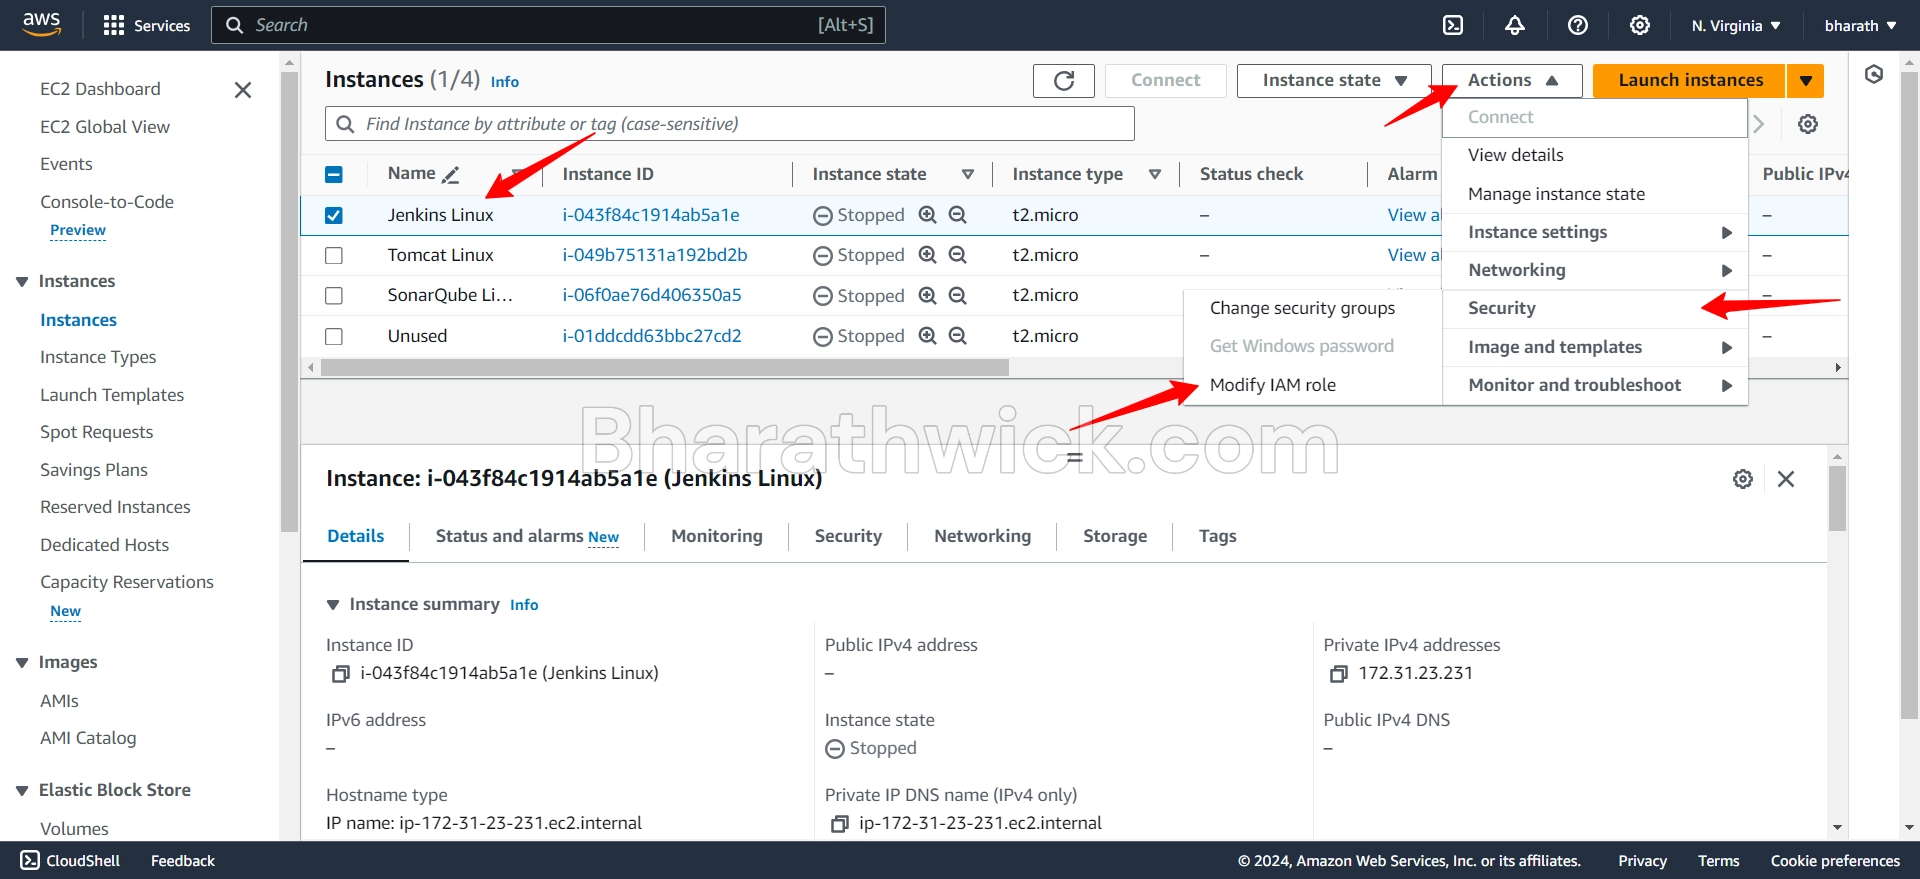
For this example, we will assign the role to an EC2 instance. To do that, you need to go to the EC2 dashboard and launch or select an EC2 instance. Then, you need to click on the Actions button and select Security > Modify IAM Role.
You will see a page where you can choose the role that you want to attach to the instance. Select the role that you have created (EC2-S3-Role) and click on the Apply button.
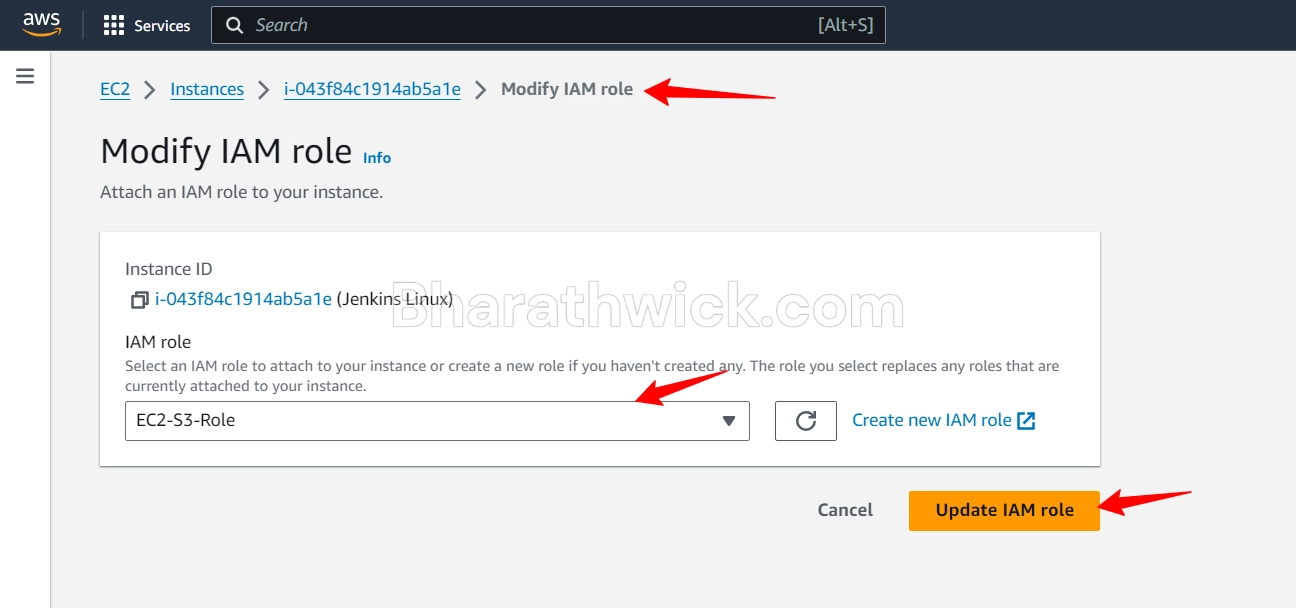
You have successfully assigned the role to the EC2 instance. Now, the EC2 instance can access the S3 buckets and objects using the permissions granted by the role.
Conclusion
In this blog post, we have learned how to create a role in AWS using IAM. We have also learned how to attach policies, add tags, and assign the role to a user, an application, or a service.
Roles are useful for granting temporary and secure access to AWS resources without sharing your credentials. You can create and manage roles using the AWS console, the AWS CLI, or the AWS SDKs.
I hope you found this blog post helpful and informative. If you have any questions or feedback, please feel free to leave a comment below. Thank you for reading!


