Azure DevOps is a powerful platform that supports development teams in planning, building, testing, and deploying applications. Whether you’re a solo developer or part of a large team, setting up an Azure DevOps account is the first step toward streamlining your development workflow.
In this guide, we’ll walk you through the process of creating an Azure DevOps account and getting started with the platform.
What is Azure DevOps?
Azure DevOps, provided by Microsoft, is a suite of development tools and services designed for collaboration across the software development lifecycle. It integrates seamlessly with other Microsoft services and third-party tools, making it a versatile option for developers. With Azure DevOps, you can:
- Manage code repositories using Git.
- Automate CI/CD pipelines.
- Plan work using agile tools like Kanban boards.
- Conduct manual and automated testing.
- If you’re new to Azure DevOps, the first step is creating an account. Let’s dive in!
Prerequisites for Creating an Azure DevOps Account
Before getting started, make sure you have:
- A Microsoft Account: If you don’t have one, you can create it at Microsoft Account Sign-Up.
- Internet Access: You’ll need a stable internet connection to access the Azure DevOps portal.
Step-by-Step Guide to Creating an Azure DevOps Account
Step 1: Visit the Azure DevOps Website
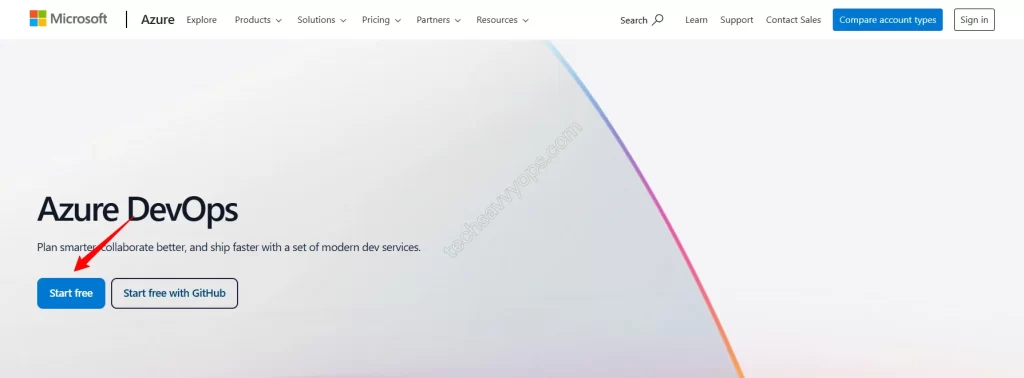
- Go to Azure DevOps.
- Click on the “Start free” button located on the homepage.
Step 2: Sign In with Your Microsoft Account
- You’ll be redirected to the Microsoft Sign-In page.
- Enter the email address associated with your Microsoft account and click “Next”.
- Provide your password and click “Sign In”.
Step 3: Set Up Your Organization
After signing in, Azure DevOps will prompt you to create an organization. An organization is a container for your projects and repositories.
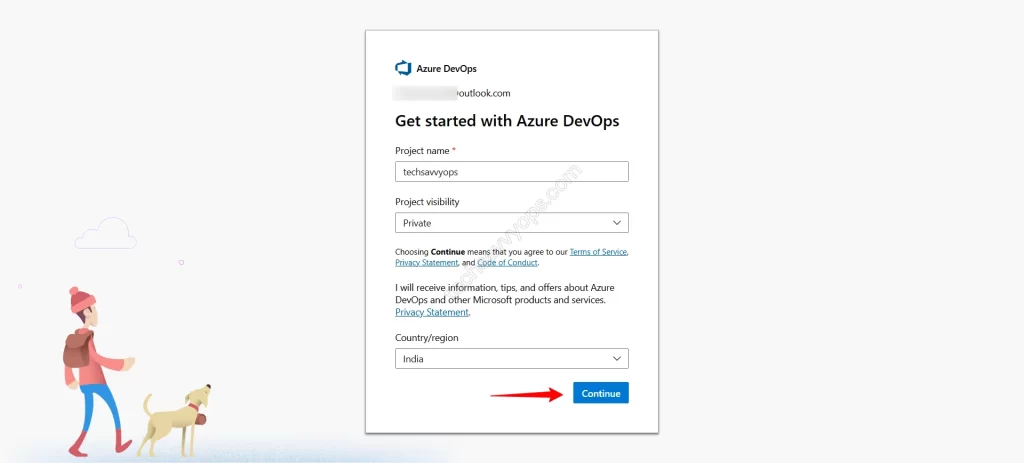
- Enter a Name for Your Organization:
- Choose a unique name for your organization. For example, “MyDevOpsOrg.”
- Azure will check if the name is available.
- Select the Region:
- Choose the region closest to your location to optimize performance.
- Click Create:
- Azure will create your organization and redirect you to the organization dashboard.
Step 4: Create Your First Project
Projects in Azure DevOps serve as containers for your code, pipelines, and work tracking.
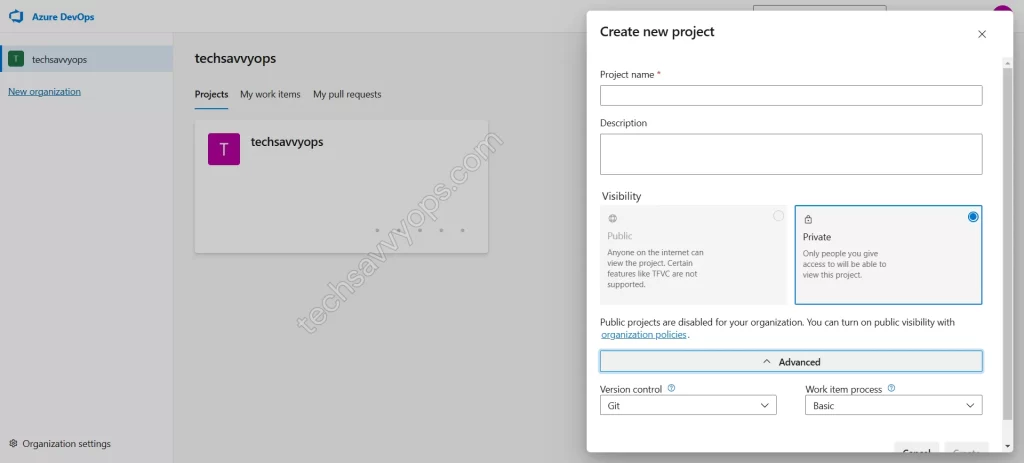
- Click the “New Project” button.
- Name Your Project:
- Provide a descriptive name, such as “WebsiteRedesign.”
- Set the Visibility:
- Choose between Public (accessible to anyone) or Private (restricted access).
- Click Create:
- Azure DevOps will set up your project.
Exploring Your Azure DevOps Dashboard
Once your account and project are set up, you can start exploring the features of Azure DevOps:
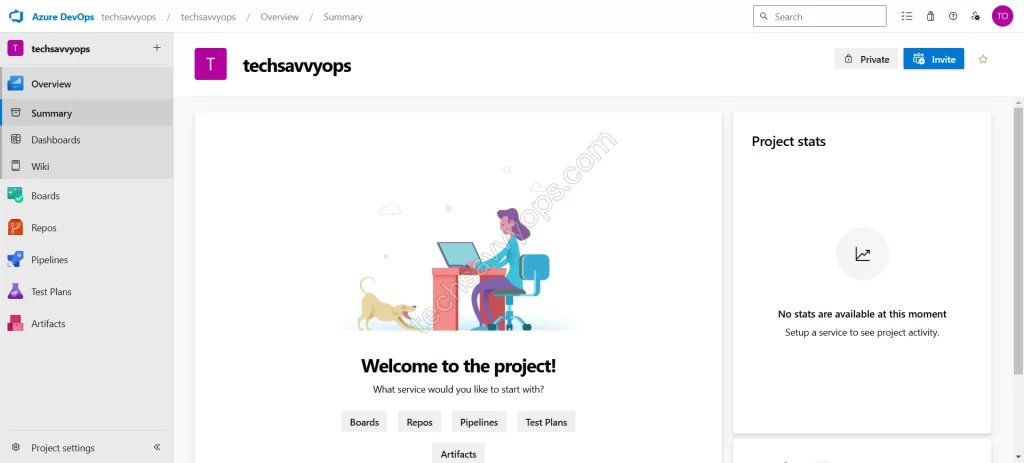
- Repos: Host and manage your Git repositories.
- Pipelines: Automate builds and deployments.
- Boards: Track tasks using agile project management tools.
- Test Plans: Create manual and automated tests.
- Artifacts: Store and share packages.
Frequently Asked Questions
- Is Azure DevOps Free? Yes, Azure DevOps offers a free tier that supports up to 5 users with access to core features like Azure Repos and Pipelines. For larger teams, you can choose from various paid plans.
- Can I Integrate Azure DevOps with Other Tools? Absolutely! Azure DevOps supports integrations with popular tools like GitHub, Slack, Jira, and more.
- Do I Need an Azure Subscription? No, you can use Azure DevOps independently. However, some advanced features may require an Azure subscription.
Final Thoughts
Creating an Azure DevOps account is a straightforward process that opens the door to efficient collaboration and streamlined development workflows. With its comprehensive suite of tools, Azure DevOps can help you manage every aspect of your software projects, from planning to deployment.
Follow the steps above, and you’ll be up and running in no time!
Start your Azure DevOps journey today and empower your team to deliver high-quality software faster.
