Security groups are one of the most important features of AWS that allow you to control the traffic to and from your resources. In this blog post, you will learn what security groups are, how they work, and how to create and configure them in AWS using the console and the command line.
What are Security Groups in AWS?
A security group is a virtual firewall that acts as a filter for the incoming and outgoing traffic of one or more AWS resources, such as EC2 instances, VPCs, or Lambda functions. A security group consists of a set of rules that specify which ports, protocols, and IP addresses are allowed or denied access to the resources associated with the security group.
Security groups are stateful, which means that they track the state of the network connections and automatically allow the response traffic for the allowed inbound traffic. For example, if you allow inbound SSH traffic from a specific IP address to an EC2 instance, the security group will also allow the outbound SSH traffic from the EC2 instance to the same IP address.
Security groups are also flexible, which means that you can modify the rules at any time and the changes will take effect immediately. You can also assign multiple security groups to a single resource or a single security group to multiple resources.
How to Create a Security Group in AWS using the Console
To create a security group in AWS using the console, you need to follow these steps:
Step 1: Log in to the AWS console and navigate to the EC2 dashboard.
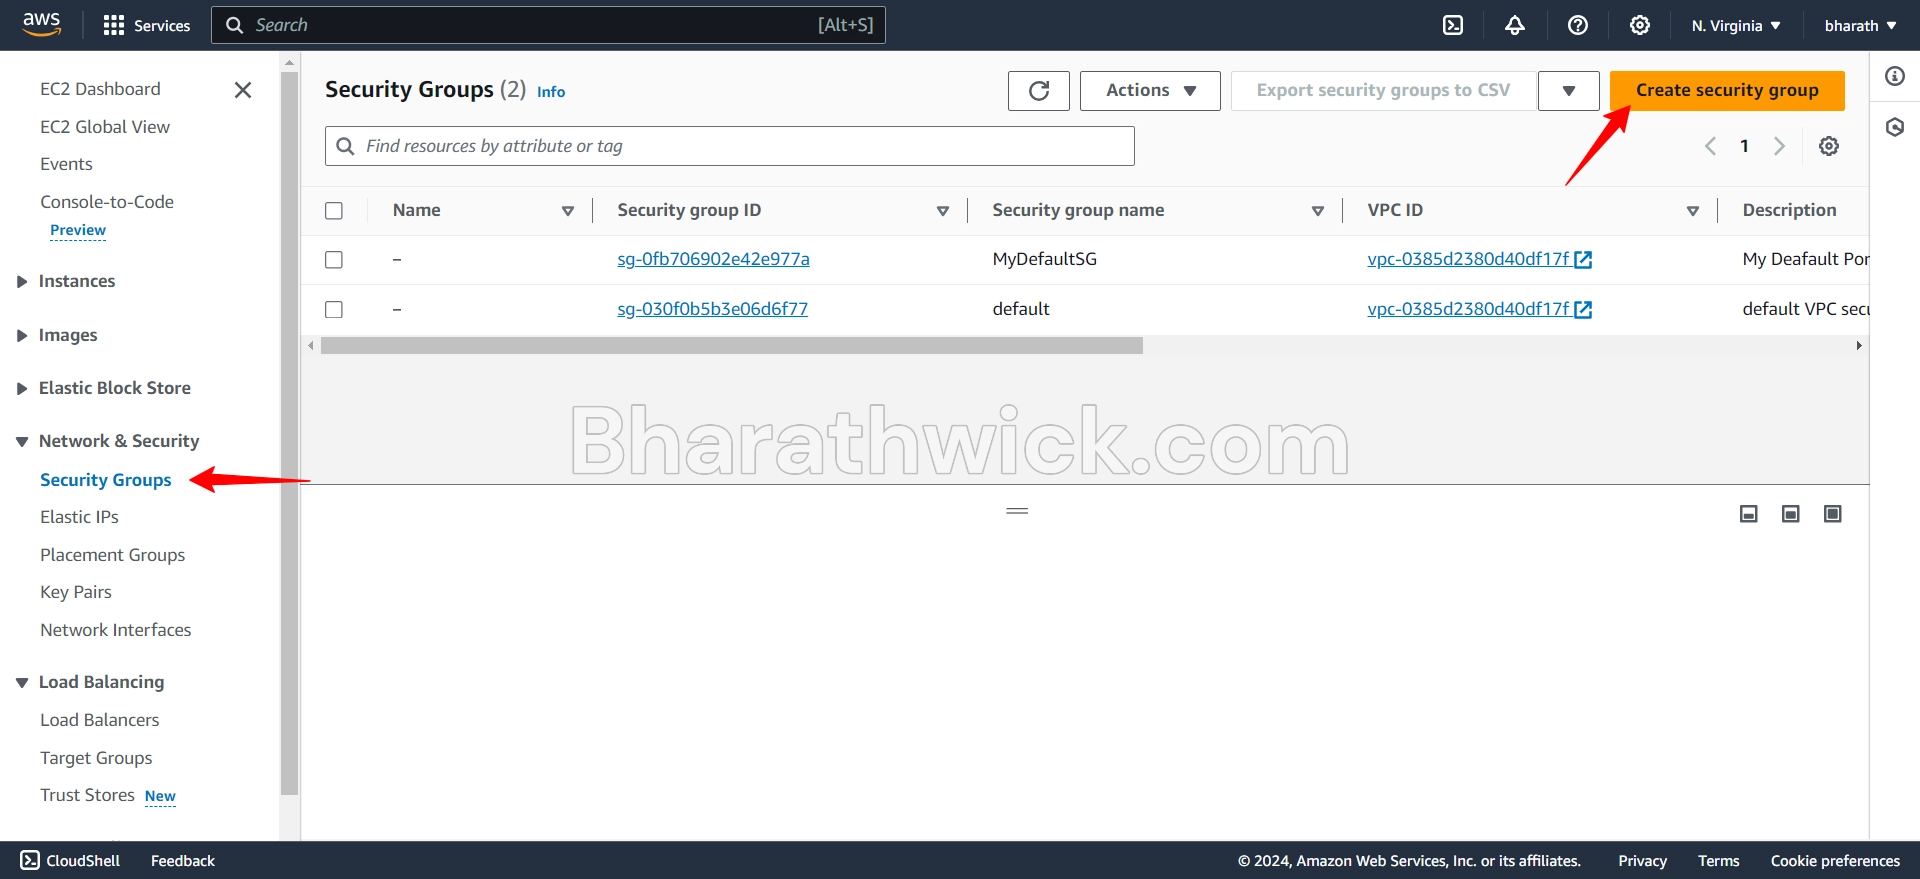
Step 2: In the left-hand menu, select Network & Security > Security Groups and click on the Create Security Group button.

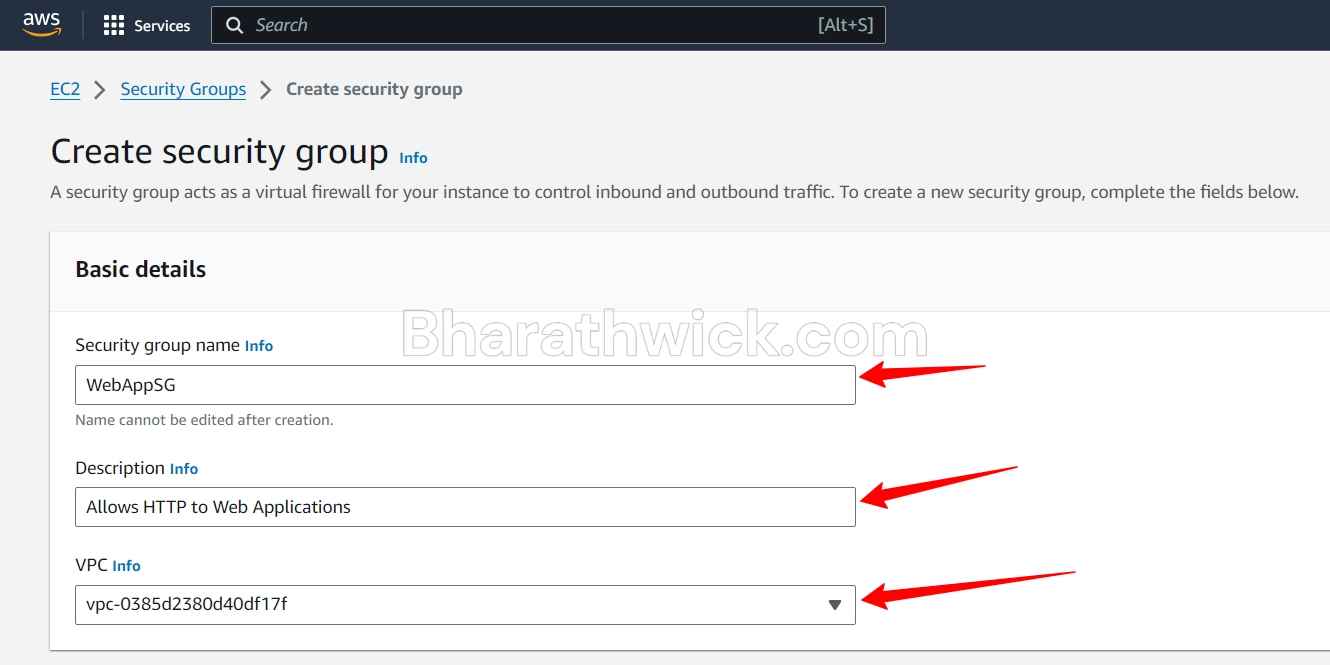
Step 3. Enter a Name and a Description for your security group and choose the VPC that you want to associate it with.

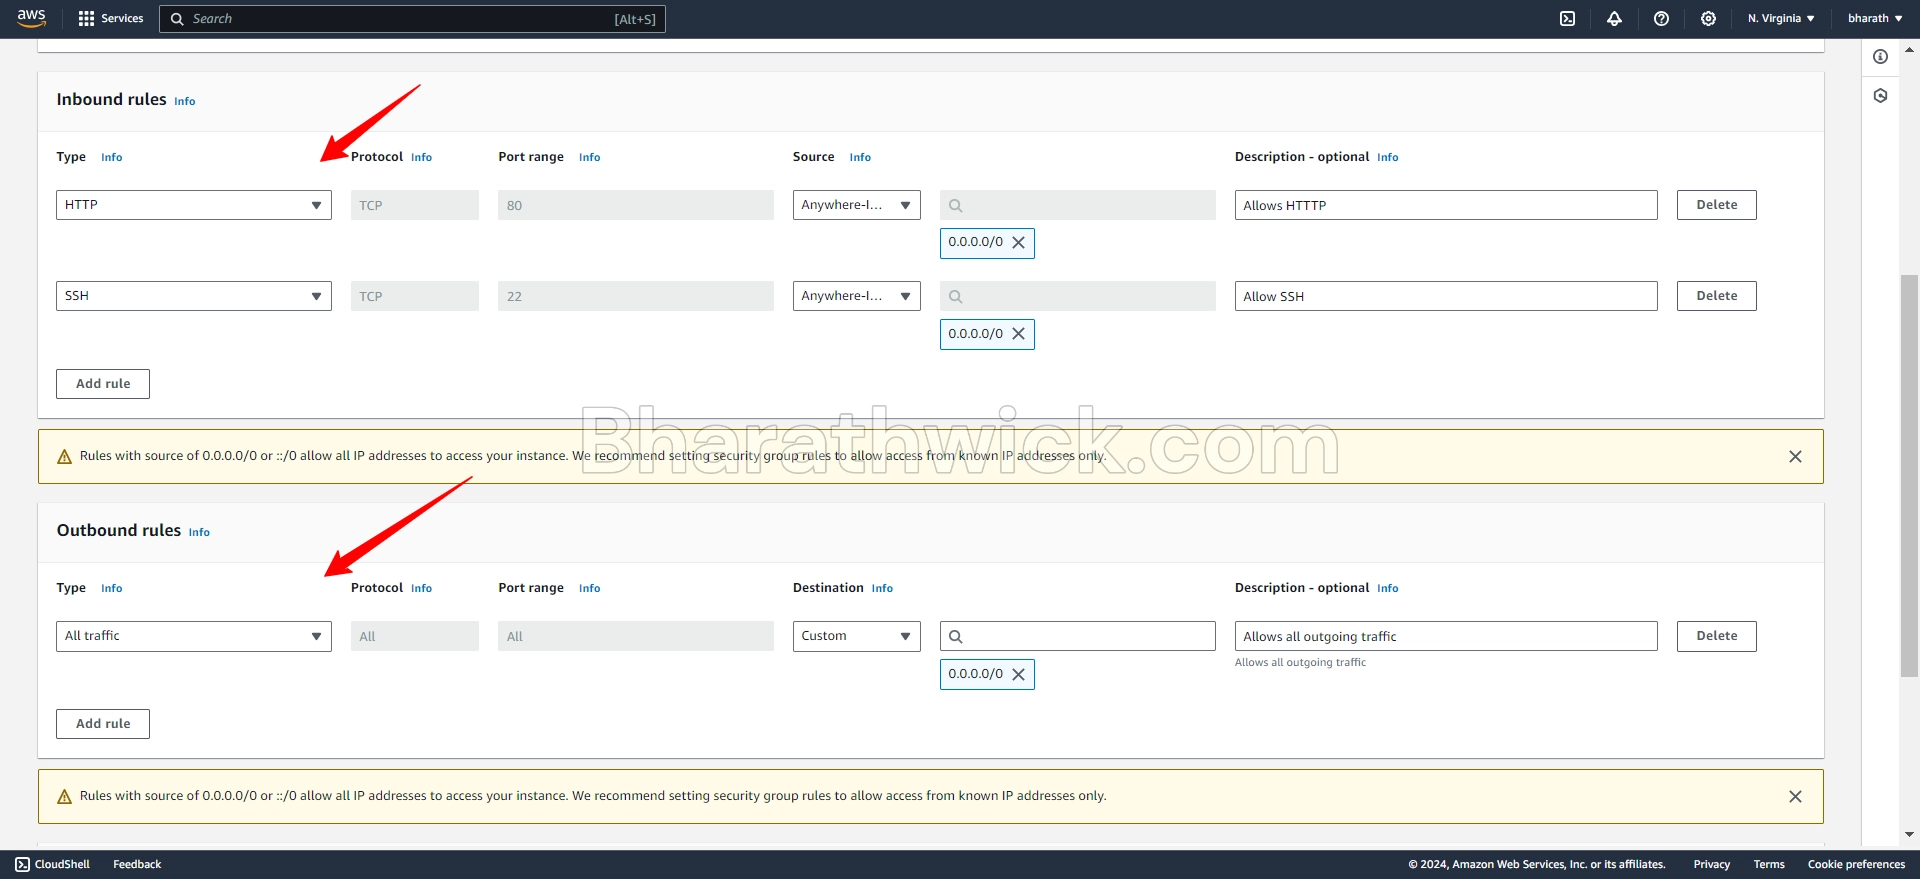
Step 4. To add rules to your security group, click on the Add Rule button and specify the type, protocol, port range, and source or destination of the traffic that you want to allow or deny.

You can use the predefined types, such as SSH, HTTP, or HTTPS, or choose Custom to enter your own values. You can also use the security group ID, the CIDR block, or the IPv4 or IPv6 address as the source or destination of the traffic.
Step 5: Optionally, you can add tags to your security group to help you identify and organize it.

Step 6: Repeat step 5 for each rule that you want to add to your security group. You can add up to 60 inbound and 60 outbound rules per security group.
Step 7: When you are done, click on the Create Security Group button to create your security group.
Final Thoughts
In this blog post, you learned how to create a security group in AWS, which is a virtual firewall that controls the network traffic for your resources. You also learned how to add inbound and outbound rules to your security group, and how to use the AWS console to create and configure your security group.
Security groups are essential for securing and managing your AWS resources, and you should always follow the best practices of using the least privilege principle, naming and tagging your security groups, and reviewing and updating your rules regularly.


